
When you receive a crown, denture, or veneer, it may seem like a simple dental procedure. But behind that seamless smile lies a fascinating journey that takes place inside a dental laboratory. Every restoration goes through a meticulous process, blending science, craftsmanship, and technology to ensure a perfect fit and natural appearance.
In this blog, we’ll take you behind the scenes—from the very first impression to the final product—to show how dental restorations are made in the lab.
Step 1: Taking the Impression or Digital Scan
The process begins in the dental clinic. After diagnosing a patient’s needs, the dentist captures the shape of the teeth and surrounding tissues. This can be done in two ways:
- Traditional Impressions: Using putty-like materials placed in trays, which record the exact structure of the mouth.
- Digital Impressions: Intraoral scanners create a 3D image of the teeth, gums, and bite with incredible accuracy.
For patients, this step is quick and painless. For laboratories, it’s the foundation of everything that follows. Accuracy here ensures the final restoration will fit comfortably.
Step 2: Transferring Data to the Laboratory
Once the impression or scan is complete, it’s sent to the dental laboratory. Traditional impressions arrive physically, while digital scans are uploaded instantly, allowing technicians to start work without delay.
At this stage, communication between dentist and lab is vital. The dentist provides specific details such as the type of restoration (crown, bridge, denture, veneer), material preferences, shade requirements, and any patient-specific considerations.
Step 3: Model Creation
In traditional workflows, technicians pour dental stone into the impression to create a physical model of the patient’s teeth. With digital impressions, a 3D model is generated using software.
This model serves as the “blueprint” for the restoration. It allows technicians to study the bite, occlusion (how the teeth come together), and the exact space available for the restoration.
Step 4: Digital Design (CAD Technology)
Modern dental laboratories use CAD (Computer-Aided Design) to design restorations with precision. Technicians digitally sculpt crowns, bridges, or dentures on a computer screen. The software allows adjustments to shape, thickness, and contour, ensuring the restoration looks and functions just like a natural tooth.
This stage also makes it possible to simulate the patient’s bite and visualize the final outcome before fabrication begins.
Step 5: Fabrication with CAM and 3D Printing
Once designed, the digital file is sent to CAM (Computer-Aided Manufacturing) machines. Depending on the type of restoration, different fabrication methods are used:
- Milling Machines: Cut restorations from blocks of ceramic, zirconia, or composite.
- 3D Printers: Build models, surgical guides, and even temporary crowns layer by layer.
- Wax or Resin Patterns: Sometimes created as an intermediate step for casting metal frameworks.
This phase brings the digital design into physical reality with extraordinary precision.
Step 6: Material Selection and Layering
One of the most important aspects of a dental restoration is the choice of material. Some common options include:
- Zirconia: Extremely strong and durable, ideal for crowns and bridges.
- E-max (Lithium Disilicate): Known for natural translucency, perfect for front teeth.
- Porcelain-Fused-to-Metal (PFM): Combines strength with aesthetics.
- Acrylic or Flexible Materials: Often used for dentures.
For restorations requiring aesthetics, such as veneers or anterior crowns, technicians apply layers of porcelain or ceramic by hand. This artistry replicates the natural translucency, shade variations, and surface texture of real teeth.
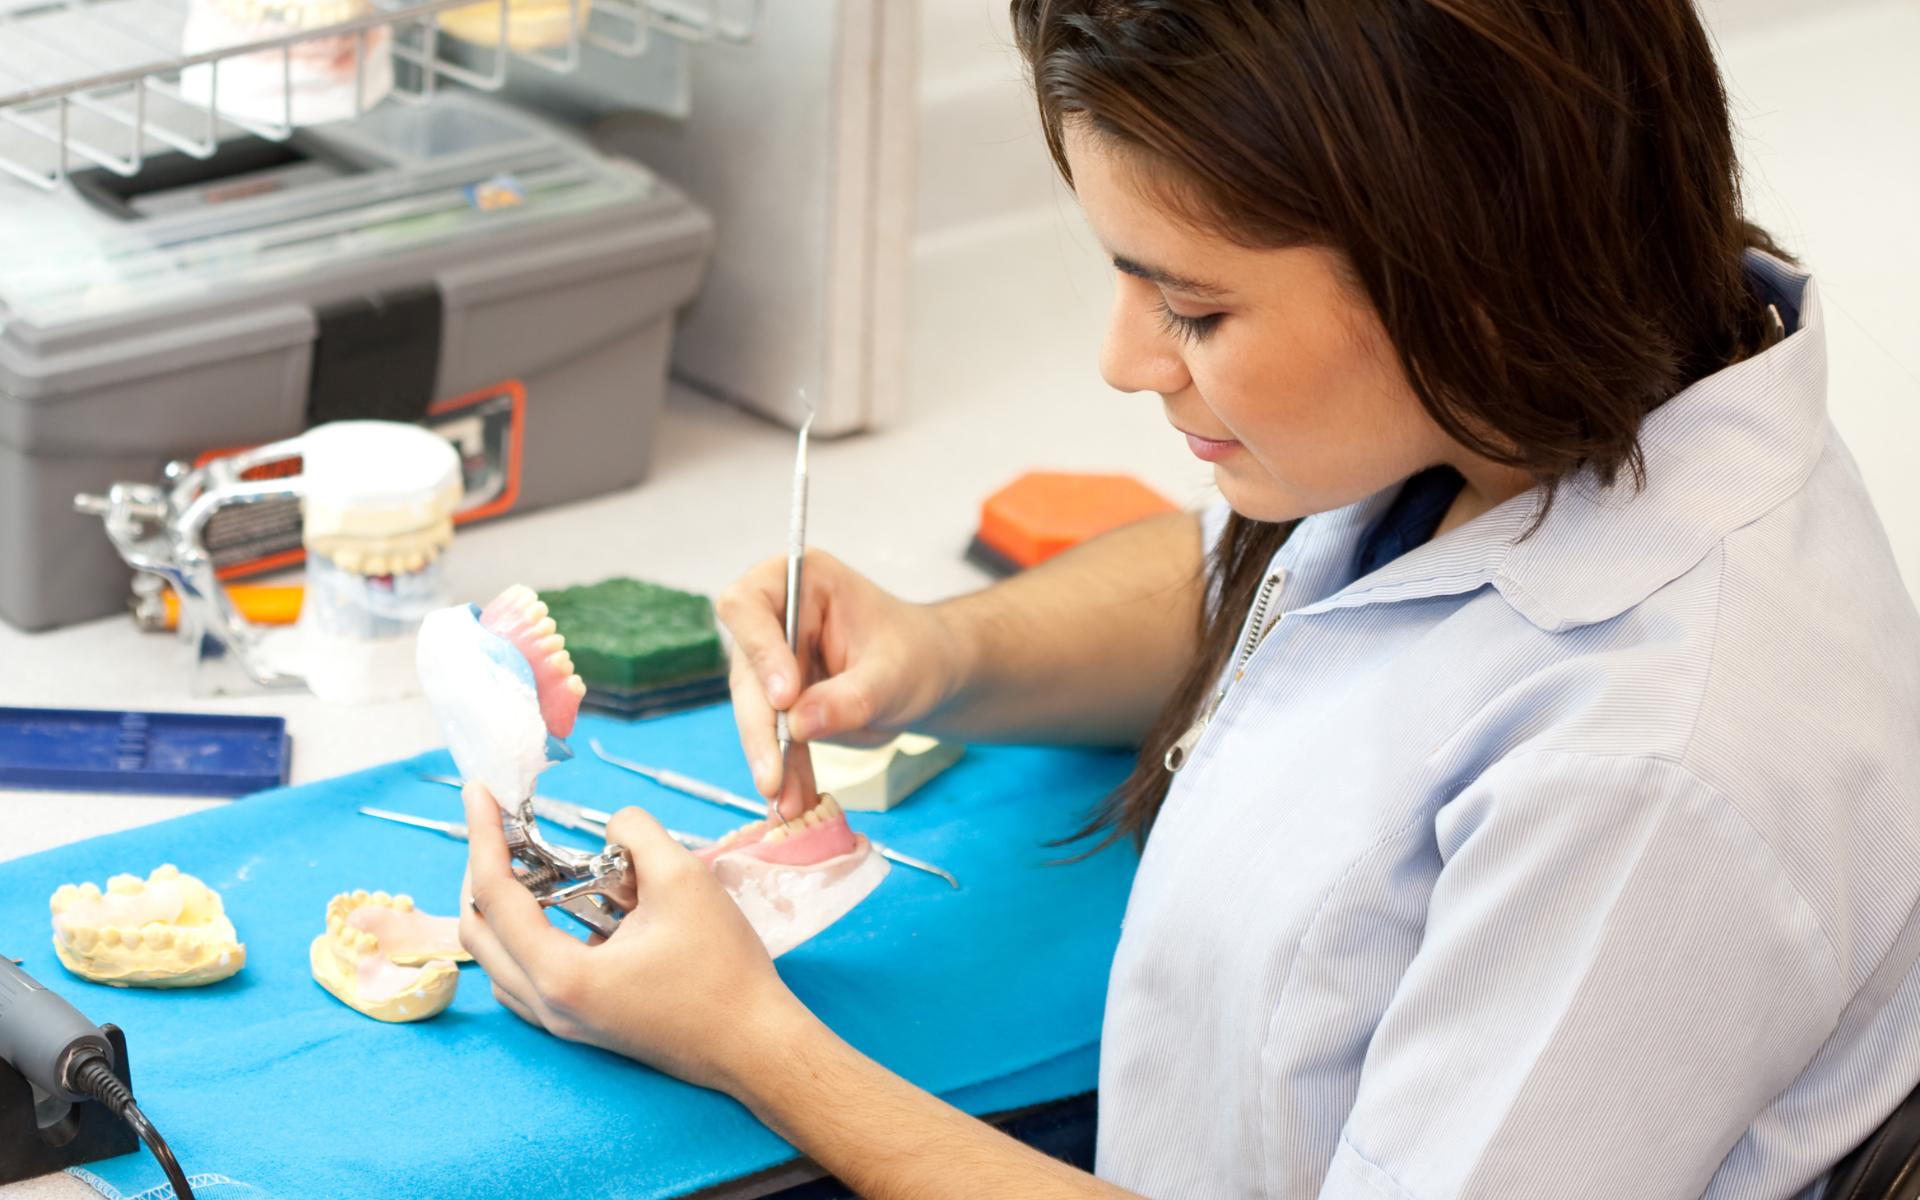
Step 7: Fitting and Adjustment
After fabrication, the restoration undergoes an initial fitting check. Technicians ensure that the margins (edges) align perfectly, the bite is correct, and there are no flaws in structure.
If necessary, adjustments are made to improve accuracy. Some restorations are tested on the model to confirm fit before they are finalized.
Step 8: Staining, Glazing, and Polishing
To give restorations their lifelike appearance, technicians add final touches:
- Staining: Applying color tints to mimic natural tooth shades and characteristics.
- Glazing: Firing the restoration in a furnace to achieve shine and durability.
- Polishing: Ensuring smoothness for comfort and resistance to plaque buildup.
This artistic step ensures the crown or veneer doesn’t just function well—it also looks indistinguishable from natural teeth.
Step 9: Quality Control and Final Inspection
Before sending the restoration back to the dentist, the laboratory team performs strict quality checks. They evaluate:
- Fit and accuracy
- Bite alignment
- Shade matching
- Surface finish
- Durability of material
Only after passing these inspections is the restoration approved for delivery.
Step 10: Delivery and Placement
Finally, the restoration is carefully packaged and sent to the dentist. At the clinic, the dentist tries the restoration on the patient, checks the fit and aesthetics, and makes any minor adjustments. Once both dentist and patient are satisfied, the restoration is cemented or fitted permanently.
From here, the patient can enjoy a restored smile—comfortable, functional, and beautiful.
Why the Process Matters
Every step in this process is essential. Even the smallest error at the impression stage or during fabrication can affect comfort, bite, and appearance. That’s why dental laboratories combine advanced technology with skilled craftsmanship to achieve perfection.
Patients may never see the inside of a lab, but the quality of their restorations directly reflects the precision, dedication, and artistry of dental technicians working behind the scenes.
The Blend of Science and Art
What makes dental restorations unique is the combination of engineering accuracy and artistic creativity. While machines ensure precision, human expertise ensures that restorations look natural.
Dental technicians are true artists, capable of recreating the smallest details of a tooth—from subtle color gradients to tiny surface textures. This blend is what transforms a clinical procedure into a smile that feels real and beautiful.
The Future of Dental Restorations
As technology advances, the process of creating restorations is becoming faster, more accurate, and more patient-friendly. Some exciting developments include:
- Chairside CAD/CAM: Allowing same-day crowns designed and milled directly in the clinic.
- Advanced 3D Printing: Capable of producing permanent restorations, not just models or temporaries.
- Artificial Intelligence (AI): Assisting in design accuracy and predicting treatment outcomes.
- Biocompatible Materials: Safer, more durable options for long-term oral health.
The future promises restorations that are not only stronger and more natural-looking but also quicker to produce—reducing waiting times for patients.